A friend that I make a lot of jewelry for had a number of requests for some Halloween jewelry this year. This piece is Halloween themed, but could work in everyday wear as well. The main inspiration were the charms shown in the picture, and that she asked for the colors to be red and black. I thought that a gunmetal chain and toggle would work well for the darker look. After I gathered up my supplies I had to determine what type of design I wanted to go with. I thought that using the clasp as the focal piece would work well, as I knew it would be a longer necklace that would not need the clasp to be opened and closed. I started simply with connecting the clasp to the main length of chain and then started connecting the dangles to the clasp itself.

I decided to go with different lengths of chain for some dimension, as well as because I knew the different drops would stand out more if they were a little off set. Since the clasp is not going to be opened and closed, the dangles could be attached directly with a jumpring to the ring portion of the clasp. I complimented the charms with some red and black Swarovski and Celestial crystals. The aluminum chain I used was lightweight and had links which weren't soldered, so it made opening the links and connecting everything easier. Plus, because it is a lightweight chain, the piece is still nice and light.
I had to adjust the cluster a few times, to get it where it wasn't too separated, but all of the drops and charms could be seen. Obviously with natural movement and gravity, some may cover others and shift, but I tried to get it where all of the charms were facing the same way and the cluster was somewhat staggered to help minimize this.
The necklace is longer so it can easily be slipped over the head. In the picture below, it was hooked on the back of the display so that the cluster would be displayed correctly, so the necklace actually hangs much lower than it appears in the picture. While this piece was made with Halloween in mind, it could be easily used in a number of different situations.
This is the first time I have used the clasp as a focal piece. I like this style as it gives it a more casual look to it. We'll have to see what I can work this technique into in the future.
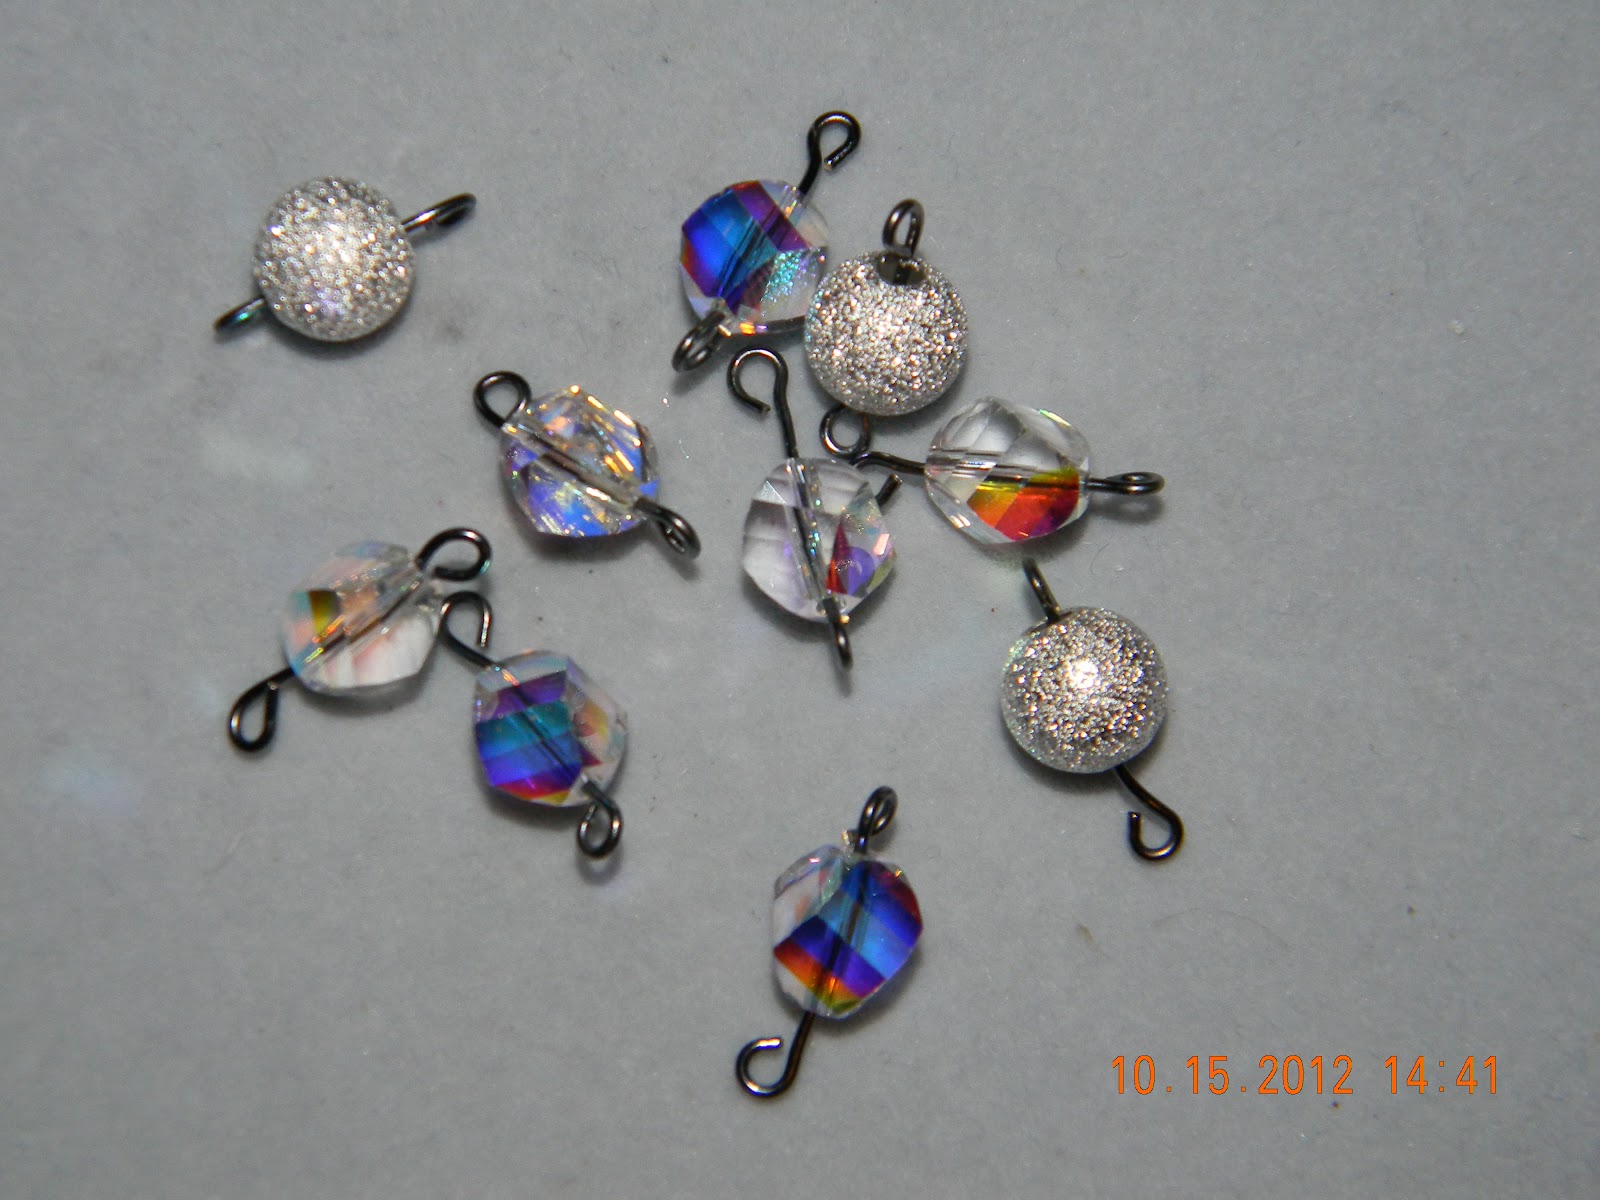
A friend received some Swarovski twist beads in a grab bag, and asked me to make her something with them. Besides the Swarovski beads, I had no direction. I thought they would look good with gunmetal findings and stardust beads. I had a gunmetal multi strand clasp, so I took some inspiration and decided to make some beaded links and connect them with gunmetal chain. First I decided to make all of my beaded links. This made the process faster as I didn't have to keep stopping to create more links. I created them all ahead of time so that I could just connect them to the chains and make the process more streamline.

Once all the beaded links were made, I started taking random lengths of chain and connecting the links and chain to make strands. The clasp was a three strand clasp, so I did one complete strand and tested the length on my own wrist to determine what length I would need. Once I got a length that I thought would work, I was able to get started on the other two strands. I tried to make it completely random, so that the spacing of the crystals and stardust beads changes on each strand.
I didn't want the strands to become twisted, so I did have to be careful when attaching the chains to each side of the clasp. What I finally ended up doing was connecting the strands to the first half of the clasp, but then before attaching the other side I secured the clasp together. With multi strand clasps I have the tendency to turn around the clasp and attach them the wrong way, so I found attaching it while the clasp is together really worked well for me.

And voila, all the strands were attached and the bracelet was done. Thankfully the bracelet was a perfect fit for my friend, but if it hadn't been I could have added or taken out links of chain to make it fit properly.
So after making the stretch bracelet with the porcelain beads and hearts, I decided it was only fitting to make a matching necklace. I used a style that I have made a few pieces with, where there is a chain in the back and section of beads in the front. I won't lie, one of my friends made something in a similar style forever ago, and I liked it so much that I used it as inspiration for my own pieces.
For this design I used the same porcelain beads and stardust beads that were used in the bracelet. I added some flexible beading wire, a gunmetal toggle clasp and some gunmetal chain. First I went about creating the front section which would be the beaded section.
I did an alternating pattern of the green porcelain beads with some silver stardust beads in two different sizes and then used one of the heart beads as a focal component. Once done the wire was crimped to create a loop on each end, and the crimp was covered with a gunmetal crimp cover. I thought that the gunmetal tone went better with this darker or more muted color scheme. To finish off the piece I took two identical lengths of the gunmetal chain that I had chosen, and then attached it to the loops on the wire. The last touch was to add the toggle clasp.
This necklace can be both casual and more formal. The style is pretty versatile, and the stardust beads give it a bit of sparkle that can work with more formal looks. Plus, the friend I made this for now has a matching set of necklace and bracelet that can work with many different outfits and settings.