Monday, November 5, 2012

Red and Black Gothic Chain Necklace


A friend that I make a lot of jewelry for had a number of requests for some Halloween jewelry this year.  This piece is Halloween themed, but could work in everyday wear as well.  The main inspiration were the charms shown in the picture, and that she asked for the colors to be red and black.  I thought that a gunmetal chain and toggle would work well for the darker look.  After I gathered up my supplies I had to determine what type of design I wanted to go with.  I thought that using the clasp as the focal piece would work well, as I knew it would be a longer necklace that would not need the clasp to be opened and closed.  I started simply with connecting the clasp to the main length of chain and then started connecting the dangles to the clasp itself. 


I decided to go with different lengths of chain for some dimension, as well as because I knew the different drops would stand out more if they were a little off set. Since the clasp is not going to be opened and closed, the dangles could be attached directly with a jumpring to the ring portion of the clasp. I complimented the charms with some red and black Swarovski and Celestial crystals.  The aluminum chain I used was lightweight and had links which weren't soldered, so it made opening the links and connecting everything easier.  Plus, because it is a lightweight chain, the piece is still nice and light. 


I had to adjust the cluster a few times, to get it where it wasn't too separated, but all of the drops and charms could be seen.  Obviously with natural movement and gravity, some may cover others and shift, but I tried to get it where all of the charms were facing the same way and the cluster was somewhat staggered to help minimize this.  

The necklace is longer so it can easily be slipped over the head.  In the picture below, it was hooked on the back of the display so that the cluster would be displayed correctly, so the necklace actually hangs much lower than it appears in the picture.  While this piece was made with Halloween in mind, it could be easily used in a number of different situations. 


This is the first time I have used the clasp as a focal piece.  I like this style as it gives it a more casual look to it.  We'll have to see what I can work this technique into in the future. 

Saturday, November 3, 2012

Chain and Crystals

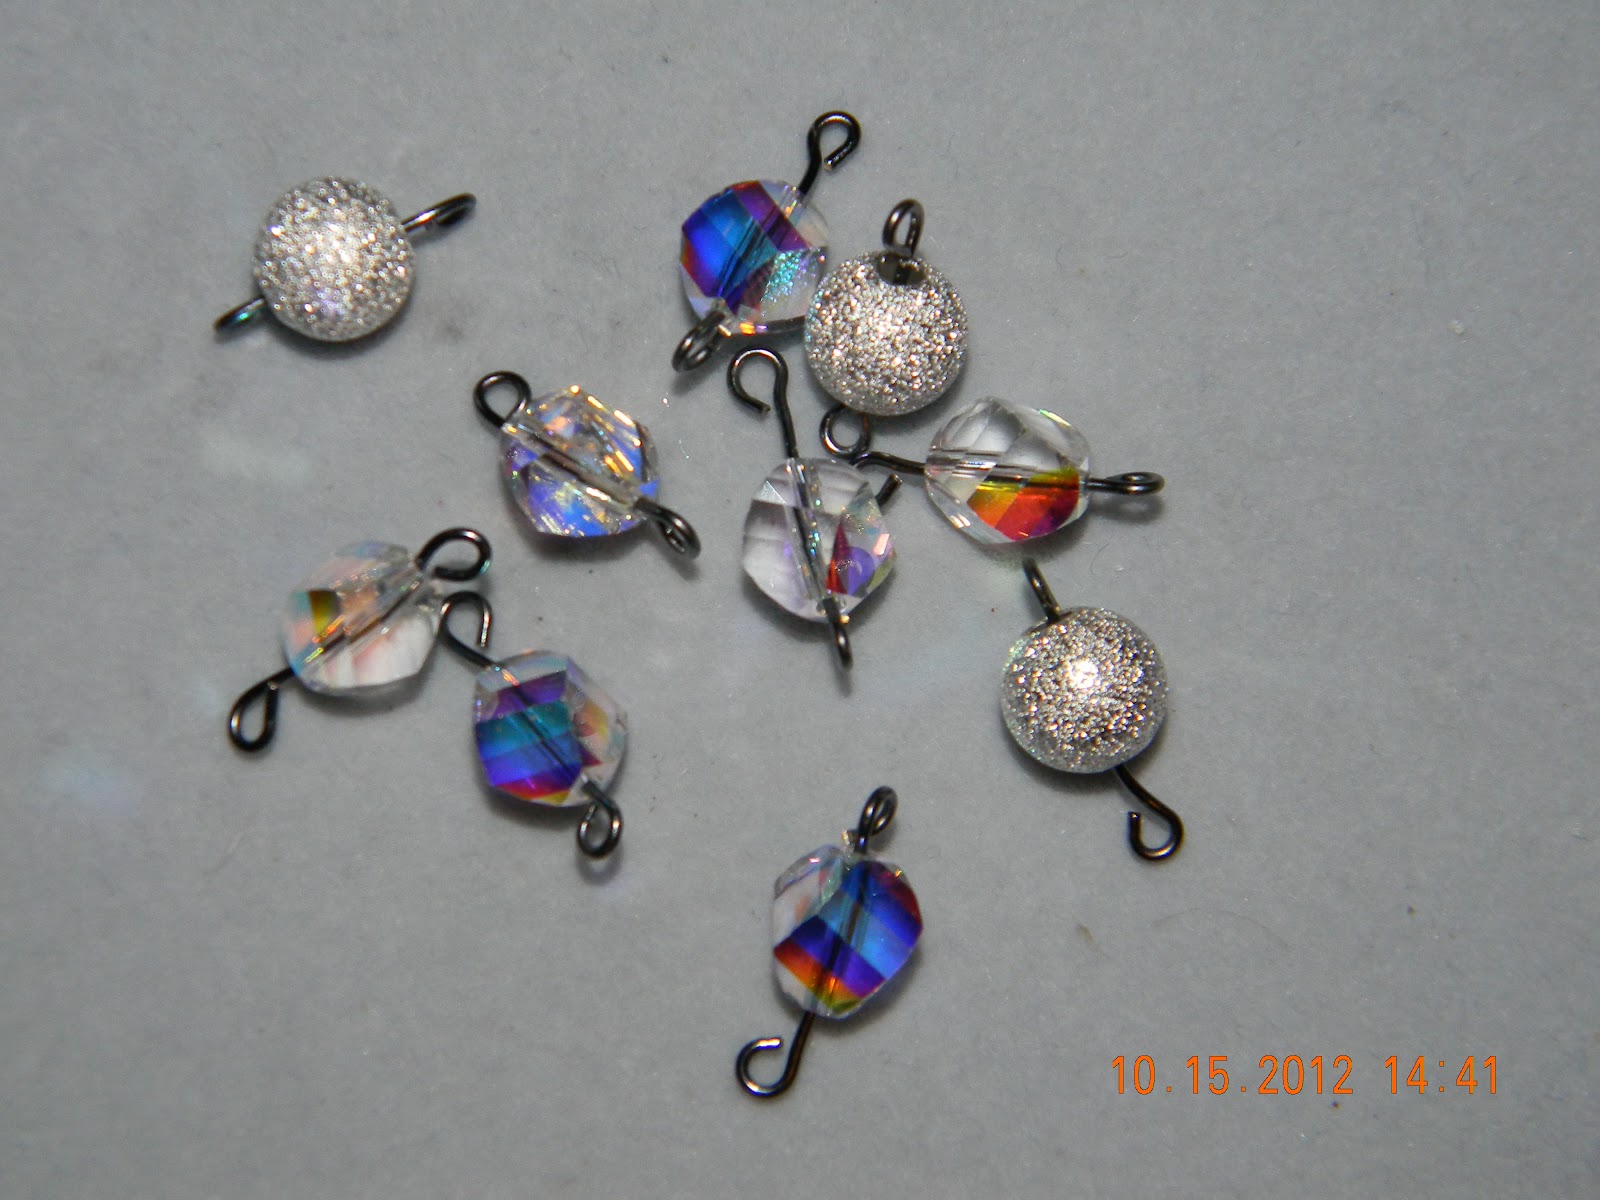
A friend received some Swarovski twist beads in a grab bag, and asked me to make her something with them.  Besides the Swarovski beads, I had no direction.  I thought they would look good with gunmetal findings and stardust beads.  I had a gunmetal multi strand clasp, so I took some inspiration and decided to make some beaded links and connect them with gunmetal chain.  First I decided to make all of my beaded links.  This made the process faster as I didn't have to keep stopping to create more links.  I created them all ahead of time so that I could just connect them to the chains and make the process more streamline. 

Once all the beaded links were made, I started taking random lengths of chain and connecting the links and chain to make strands.  The clasp was a three strand clasp, so I did one complete strand and tested the length on my own wrist to determine what length I would need.  Once I got a length that I thought would work, I was able to get started on the other two strands.  I tried to make it completely random, so that the spacing of the crystals and stardust beads changes on each strand. 


I didn't want the strands to become twisted, so I did have to be careful when attaching the chains to each side of the clasp.  What I finally ended up doing was connecting the strands to the first half of the clasp, but then before attaching the other side I secured the clasp together.  With multi strand clasps I have the tendency to turn around the clasp and attach them the wrong way, so I found attaching it while the clasp is together really worked well for me. 


And voila, all the strands were attached and the bracelet was done.  Thankfully the bracelet was a perfect fit for my friend, but if it hadn't been I could have added or taken out links of chain to make it fit properly. 


Thursday, November 1, 2012

More Hearts To Be Had

So after making the stretch bracelet with the porcelain beads and hearts, I decided it was only fitting to make a matching necklace.  I used a style that I have made a few pieces with, where there is a chain in the back and section of beads in the front.  I won't lie, one of my friends made something in a similar style forever ago, and I liked it so much that I used it as inspiration for my own pieces.  


For this design I used the same porcelain beads and stardust beads that were used in the bracelet.  I added some flexible beading wire, a gunmetal toggle clasp and some gunmetal chain.  First I went about creating the front section which would be the beaded section. 


I did an alternating pattern of the green porcelain beads with some silver stardust beads in two different sizes and then used one of the heart beads as a focal component.  Once done the wire was crimped to create a loop on each end, and the crimp was covered with a gunmetal crimp cover.  I thought that the gunmetal tone went better with this darker or more muted color scheme.   To finish off the piece I took two identical lengths of the gunmetal chain that I had chosen, and then attached it to the loops on the wire.  The last touch was to add the toggle clasp. 

This necklace can be both casual and more formal.  The style is pretty versatile, and the stardust beads give it a bit of sparkle that can work with more formal looks.  Plus, the friend I made this for now has a matching set of necklace and bracelet that can work with many different outfits and settings. 

Tuesday, October 30, 2012

Festive Santa Stretch Bracelet

Another Holiday themed bracelet coming your way.  This time I used some vibrant red beads with Santas on them as well as some patterns.  I paired these with gold plated...you guessed it....stardust beads! This really shouldn't surprise you by now. 

Again, this is done with two strands of powercord because of the weight of the beads.  When I secure the surgeon's knot I use some loctite gel glue to help keep it secure.  It dries quickly and works like a dream. 


I love using bead stoppers on one end of the cord so that my beads don't slip off.  Yes, you could knot the end of the cord, but with these beads, they could slip right over the knot.  Plus, the bead stopper is easily removable, while a knot may be hard to remove.  

The pattern on this bracelet ended up being more random.  The pattern does not match, but in this situation I did not feel that it was necessary. 


See this item in my shop!
The combination of red and gold came out really nicely.  Plus, with a little green in a couple of the beads there is definitely a festive holiday look to it. 

Sunday, October 28, 2012

Snowmen and Snowflakes

I know, I know...it's not even the end of October yet but I do need to get ahead of the curve and get some holiday or winter themed pieces done and listed so that people have the opportunity to buy them before Christmas or the end of the year.  So...with that in mind I decided to get a start on it with some winter/holiday themed stretch bracelets.  This first one is composed of silver stardust beads and glass beads.  Yes, you may have noticed I use a lot of stardust beads in my jewelry.  I may be addicted to stardust beads.  A little. Maybe.


This bracelet ended up with a steady pattern, I decided to make it match.  Some designs look better random, but I thought this one would look good with a consistent pattern. This bracelet was made using Powercord, and as with the Halloween bracelets I made it was made with two strands/  With the heavier beads it works well because two strands will not stretch out as much, and they will also give some added security.  


See this bracelet in my shop!
The two stardust beads on the bottom of the bracelet have some diamond cut details on it. This is the first time I have used them.  I'm not sure that I will use them in a lot of my pieces (unlike regular stardust beads, which we have already talked about). They do have a nice look, but the diamond cut detailing takes away some of their sparkle in my opinion.  Overall though, I really do like how the bracelet turned out and foresee more of these in my future. 

Wednesday, October 10, 2012

Keeping Your Place, Halloween Style

I tend to make a lot of ribbon bookmarks.  Up until now a lot of them have just been a single length of ribbon with beads or charms attached.  I decided to try laying two different colors and sizes of ribbon together to see if it would work.  

I had a couple leftover Halloween beads from the last couple bracelets I made and had recently picked up some new ribbon to work with. I started with layering a thin black ribbon on top of the orange ribbon.  I secured the ribbon down the middle using some Ultimate adhesive.  Getting it perfectly lined up down the middle took some work, but I found going slow combined with using some tweezers to lay down the black ribbon worked well.  With the Ultimate adhesive (which has a consistency similar to Elmer's glue) you can manipulate it, but there may be some residue if you move it too much.  

After gluing the ribbon down and letting it dry for a while, I then added ribbon crimps to each end.  These are secured using nylon jaw pliers, but I always add a little adhesive on the edge of the ribbon.  This not only helps to secure the ribbon crimps, but I find it can help keep the ribbon from fraying a little as well.  It won't completely stop fraying but definitely helps to prevent it.  

The beads that I had leftover were a black skull and a Jack O'Lantern bead.  I decided to add a couple stardust beads for some sparkle. 
After digging out some gunmetal headpins (I just felt they would disappear more and highlight the beads) and creating drops, I attached them to each ribbon crimp, and voila! Instant and unique bookmarks.  

I love these ribbon bookmarks.  Each one is unique and can be personalized to the owner.  The possibilities and color combinations are endless.  I have a number of these available in my etsy shop and am currently working on more that are themed.   These bookmarks are also incredibly gentle on books.  All of the ones that I make are long enough to work in a standard hardback book.  They are flexible, so they don't damage pages or the spine.  

Thursday, October 4, 2012

Let's Talk Illusion

So...my favorite style of jewelry to make is illusion style.  Well, it is at least one of my favorites and one of the ones I am most familiar with.  It's a style that can be used in either multi-strand designs, or single strands.  Plus, you can use it to make pretty much any piece.  
See this bracelet in my Etsy Store!
I prefer to use crimp covers over the crimps that I use because I feel that they give the piece a more polished look overall.  Many people prefer to just crimp their crimps normally, or flatten them using chain nose pliers.  No method is wrong, I just prefer to use covers.  This makes it appear like they are just sections of beads held in place, but you can't really tell what is holding them in place.  


With illusion style, you can be as symmetrical or as random as you would prefer to be.  Some of my designs are precisely spaced where the sides mirror eachother in beads and spacing.  This especially happens when I make illusion style necklaces, I will almost always make these completely symmetrical. 

In these pieces I not only make the spacing and number of beads match, but I will match the shapes and the colors.  When I do illusion style bracelets, I will often just be completely random; however, when I do multiple strands I try to make sure that the way the spacing ends up, there will not be much blank space when the piece is worn.  If there is a gap on the wire in one strand, I will usually try some beads lining up in that area on another strand. 

Using crimp covers can take some practice.  Believe me, I flattened or ruined many many crimp covers before I got the hang of it.  The best way I have found to close these is by using the very tips of my crimping pliers and then applying gentle pressure.  If the bead does not line up properly or if it's just a little wonky, then I will gently adjust it with the same portion of the pliers.  
Click here to view in my Etsy store!

Creating these pieces can be very time consuming, especially if you are doing a more symmetrical design that requires precise spacing.  Don't feel bad if you need to step away for a minute, or rest your eyes.  I often have to stop for a while as it can put a strain on both your hands and eyes.  As mentioned in a previous post, if you need to mark where you left off or hold beads in place, then use a bit of scotch tape (or a bead stopper) to secure them. 


I love this style as there are just so many different looks you can create.  Using different bead shapes, spacing and number of strands make the possibilities endless.  Yes, it can take some practice, but the end result is elegant and beautiful.  If you commit to creating this style, you will need to become very good friends with your crimping pliers, crimps and crimp covers. I think it is worth it, don't you?